Friday, April 30, 2010

Pottery Barn Inspired Pedestal Table

From drab to fab in a matter of days. I found this beauty (please see photo below) on craigslist. It was listed for $50. I had a feeling I would be able to snag this 'beauty' for less than asking price and was thrilled when the owners accepted my $30 offer.


A steal of a deal.
Solid wood ... check.
No chips or cracks ... check.
Included large leaf for table ... check check.

I've been dreaming of a pedestal table for awhile now, I just couldn't find the right price. Thank you craigslist for helping me find my bargain!

With my $30 table on hand, I was ready to begin! This is 'kind of' what I had in mind. Something like this ...


or this ...


because, as usual, what's not to love about Pottery Barn and the looks they create. I can usually be found drooling over their catalogues and trying to dream up new ideas on how to get the PB look for a fraction of a cost.

So ................... with sander in hand, I began sanding out the dried cherrios and left over food from the table.


After sanding, I used the air compressor to blow off all the dust, then wiped clean with a tack cloth.

Armed with my mini roller and black paint/primer combination, I was ready to begin painting this table a few coats of paint.


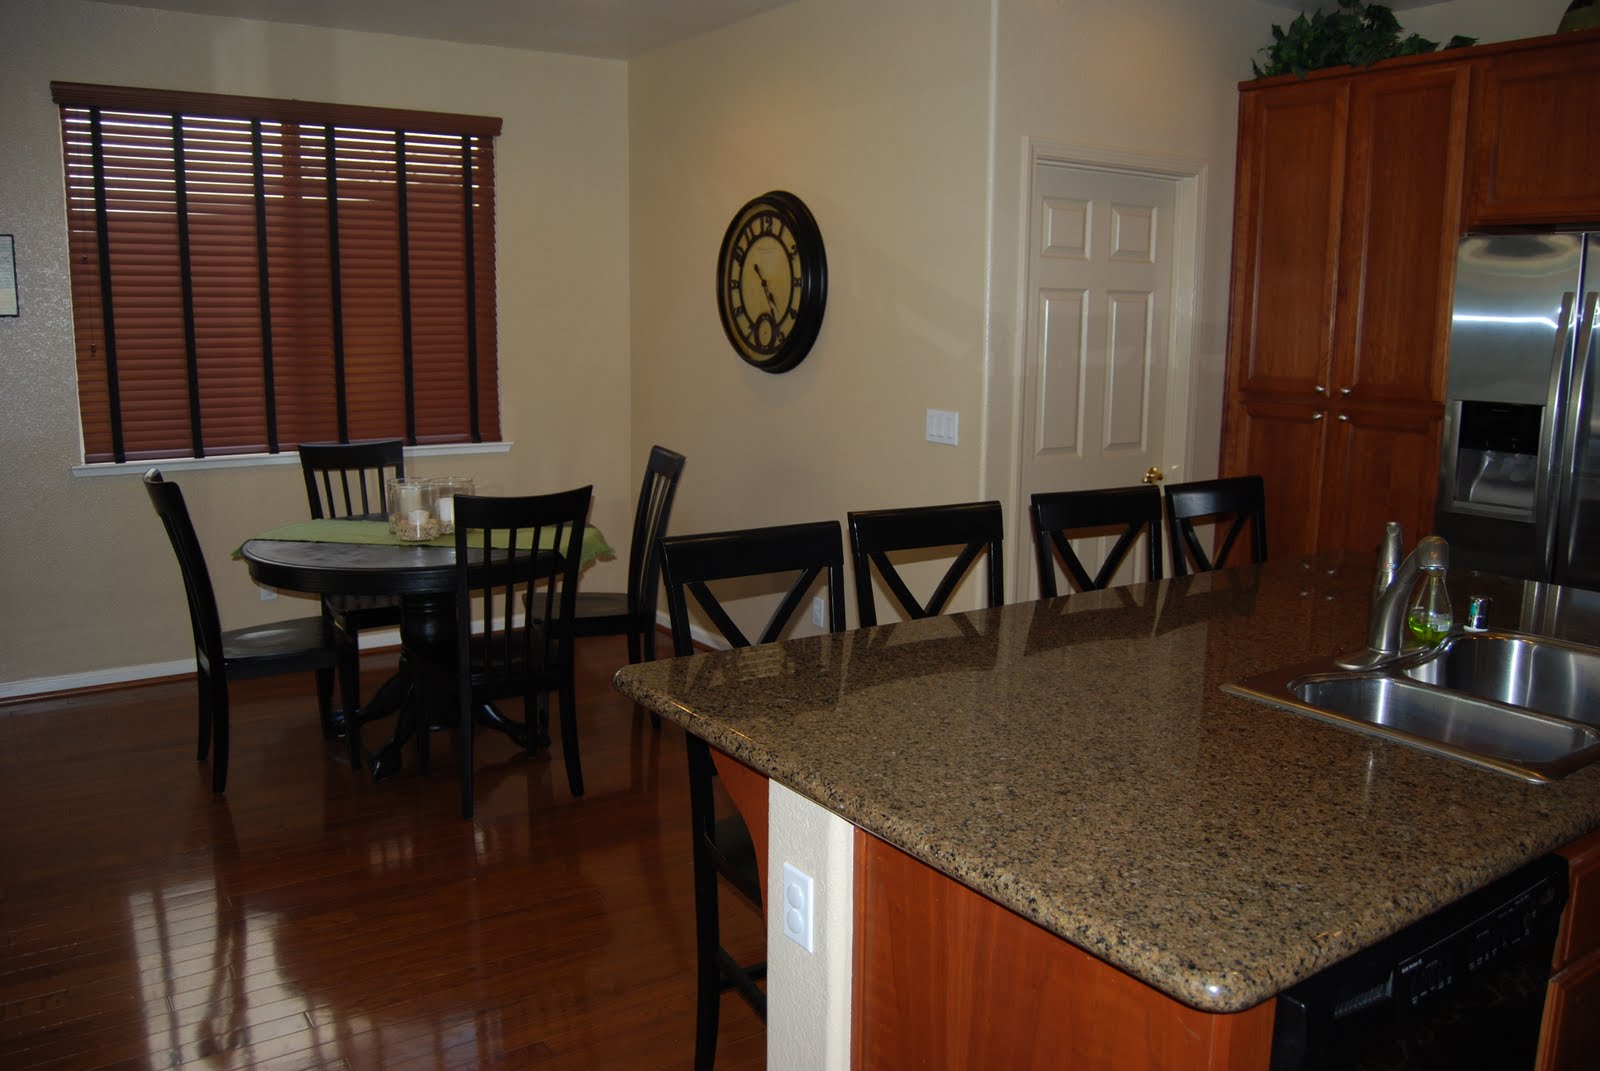
A few coats later. Finished!


As for my kitchen chairs, I'm almost embarrased to admit what I did for my chairs. I lightly sanded them down with a 200 grit sandpaper, wiped clean and then spray painted. Yes, like the kind of spray paint you buy from a can. I went through 4 cans. These were chairs I already had and was using with my old kitchen table. They were FREE so I couldn't complain to much.


The results!


You might be wondering why such a dark kitchen and why black? First of all, our appliances are stainless and black and our granite is speckled with black. I'm definitely a matchy-matchy type of person and felt black would suit our house best. Plus, for a $30 dollar table, I figured if it didn't look great, I could always start over or try something else. I guess I just have a thing for dark cherry wood and black right now. That's half the fun of DIY'ing and decorating ~ is redoing it when you get sick of it.


I still have a long way to go in our kitchen with decorating, tile backsplash, etc. Baby steps, I keep reminding myself.

This post is linked to: The Shabby Nest, Finding Fabulous, A Few of my Favorite Things, It's Fun to Craft


Wednesday, April 28, 2010

My 1st "Feature"

After a long 2 hour nap this afternoon (I know ... lazy bones while my daughter was napping) I have no desire to sleep. The house is clean, everything is in order for tomorrow so I decided to sit down with my laptop and start a new blog about my latest project. What better way to use my time than with a new blog, right? So a blogging I began.

However, I became slightly distracted as I realized I had a new follower and a new comment in my inbox telling me I was going to be featured on Kristi's blog - The Speckled Dog.

Geesh, was I excited! This is my very first feature on another blog. Make sure you check out my feature and the rest of Kristi's favorite DIY projects from the week. Check them out here "The Speckled Dog." Thanks Kristi, you made my day!


Wednesday, April 21, 2010

Cream Puffs

It's been raining, gloomy and pretty cold here in California this week so I thought I'd spruce up my blog and post about one of my favorite desserts - cream puffs! Can you tell I'm dreaming of summer entertaining already?

This is an easy recipe for all to enjoy. Plus, cream puffs can be decorated, the filling can be changed, and toppings can be added. You will definitely have a chance to bring out the inner pastry chef in you with this recipe.

First of all, the recipe, which comes from Better Homes and Gardens Special Edition Breast Cancer Cookbook. This is probably one of my favorite cookbooks right now and has become a staple in everyday cooking lately. Plus, purchasing this book a few years ago was helping benefit a great cause as well. It was truly a win-win.

Cream Puffs
Prep: 30 minutes, Cool: 10 minutes, Bake: 30 minutes, Oven: 400'F, Makes: 12 cream puffs

1 cup water
1/2 cup butter
1/8 teaspoon salt
1 cup all-purpose flour
4 eggs
3 cups whipping cream, pudding, or ice cream
Powdered sugar (optional)

1. In a medium saucepan combine water, butter, and salt. Bring to boiling. Add flour all at once, stirring vigorously. Cook and stir until mixture forms a ball. Remove from heat. Cool for 10 minutes. Add eggs, 1 at a time, beating well with a wooden spoon after each addition.


2. Drop 12 heapting tablespoons of dough onto a greased baking sheet. Bake in a 400 degree oven for 30 to 35 minutes or until golden. Transfer cream puffs to a wire rack; cool.


3. Cut tops from puffs; remove soft dough from inside. Filled with whipped cream or desired filling. Replace tops. If desired, sift powdered sugar over the top, add swirls of chocolate syrup, or any added garnish you wish.

For an easy filling inside the cream puff, I actually use a few scoops of vanilla bean ice cream. It's an easy filler with an amazing taste, which is shown below.


As an extra garnish, you can also add swirls of chocolate syrup on the top similar to what an eclair would look like.


Picture courtesy of My Recipes.

Added bonus: You can also use this recipe for eclairs. Prepare as above, except spoon dough into a decorating bag fitting with a large plain round tip (about 1/2-inch opening). Pipe 12 strips of dough, 3 inches apart, onto a greased baking sheet, making each strip 4 inches long, 1 inch wide, and 3/4 inch high. Bake, cool, and split as in steps 2 and 3. Fill eclairs with whipped cream or pudding. Frost with chocolate glaze.


Sunday, April 18, 2010

Doormat Wall Art

Simply put, I used a doormat to make art for my walls. Yes, a rubber doormat from Lowe's. It was simple, easy, and I love the finished results.

About a year ago, I came across an article in my "Lowe's Creative Ideas" magazine about this project. I fell in love and thought, "I must add this to my to-do list."

You may have seen this project on other blogging websites, as well, but I originally credit this project idea to Lowe's. I followed their directions in what to purchase, color options, size, etc.

1. Ask a Lowe’s employee (or in my case, my darling husband) to cut each 1 x 12 x 6 board in half, creating four approximately 3-foot-long boards.

2. Sand the boards, and wipe clean. Wearing gloves, apply stain to the boards following the manufacturer’s instructions. Let dry, and repeat with additional coats if needed to achieve the desired finish. Allow to dry completely.


I even lucked out on my Miniwax stain to score and extra bargain. I already had an extra can sitting on my paint shelf so I saved myself a few extra bucks.


After allowing the stain to dry completely, I added an extra step in here (which differs from Lowe's) and actually used blue painter's tape to tape off the areas I did not want spray paint, such as the sides and directly along the edge. I wanted to make sure the top and bottom had a straight edge and the sides were paint free. The tape worked perfectly, but definitely was a little difficult to get straight! It took me a few times.

3. Cover a flat work surface with a drop cloth, and place two of the boards side by side. Position the doormat face up and centered on the boards. Use painter’s tape to cover any exposed areas outside the border of the mat, including the boards’ side edges.

4. Apply a coat of spray primer to the boards through the mat, spraying from straight above. Then apply two or three light coats of spray paint. Note: Heavy coats of paint will blur the stencil design. Allow each coat to dry.


5. Remove the doormat, and repeat Steps 3–4 for the remaining two boards.

I must admit, I was most nervous about Step 5 - removing the doormat. There was a little bit of anxiety and uncertainty of whether or not the spray paint bled or didn't spray through enough.


6. Spray the boards with clear polyurethane. Allow to dry. Hang the boards using picture hangers and appropriate hardware for your wall type.

Voila ~ the finished results!


A few extra tips from blogland.
- Do not use spray paint as the background color and then try to use white spray paint over the doormat. It will bleed.
- Make sure you do not coat the stain to thick or make sure you wipe stain completely. During my last coat of stain, I used a saturated rag to clean up the residue leaving too much stain on the boards. A tacky, sticky board remained. I was bummed. However, a little paint thinner on a rag cleaned it right up and I didn't even need to re-stain.
- Do thin, light coats of white spray paint. It's more effective and will lead to less bleeding of the spray paint.

Good luck!!!!!

This post is linked to:
DIY Show Off, Between Naps on the Porch, Persimmon Perch, It's So Very Cheri.


Thursday, April 1, 2010

Adding a Little More Fun

In honor of April Fool's Day and to have a little bit of fun, I decided to post a super quick, easy project I finished for my daughter's playroom. How fun, right?

In a previous post found here, I explained my love for children's Pottery Barn tables, but a dislike for the super expensive prices. So ... as usual ... what's a mom on a budget to do? Hunt down the bargain stores to see what I can find. Apparently $1.99 is my new price at Goodwill because I found a little storage/side/end table for $1.99. I knew it would be perfect to store my daughter's baby doll items and for the baby doll area of our playroom.

But, as usual, this little piece was pretty ugly. The brown was a very 'bright' colored brown and needed a bit of sanding prior to painting.


And, the little handle was purple. Brown and purple for a little side table, what a combination! I can definitely see how the combination would be cute in some girl rooms or playrooms, but it just was not the look I was trying to go for to match the children's table I painted a few weeks ago.


This is what the table looked like after I sanded it all down. Actually, I thought it was pretty cute with the shabby chic look I just created. I debated about keeping it shabby chic or roughing up the edges once it was painted, but I decided it will eventually look a little worn in a children's play area and I kept with my original thought - match my current table/chair set.


After sanding down the table, I painted a simple coat of primer. I waited about an hour and then painted two coats (of my PB inspired green paint), letting dry in between each coat of paint. The best part of this project? I already had the green paint (remaining paint left over from my children's table) and primer so this project ultimately cost me $1.99.


Voila! The final results.


Do you have any other children's play area or playroom design tips? I'm trying to figure out how to make the room more cohesive and flow. I'm working on it. One step at a time!